Occasionally you will get the request from either a client or a user to help with a simple method of being able to duplicate a record but changing only maybe one or two fields . This is the perfect opportunity to use dialogs and also to use the newly added dialog lookup feature.
In our example we have job detail lines for a company which contain the employee working on that job what hours they work and how much they get paid. Each week the job details may change, so the CRM user will need to end the current job detail on a specific date and duplicate the current job detail line giving it a new employee.
So the first task is to go in and create our dialog. In our example we have done this is in a separate solution.
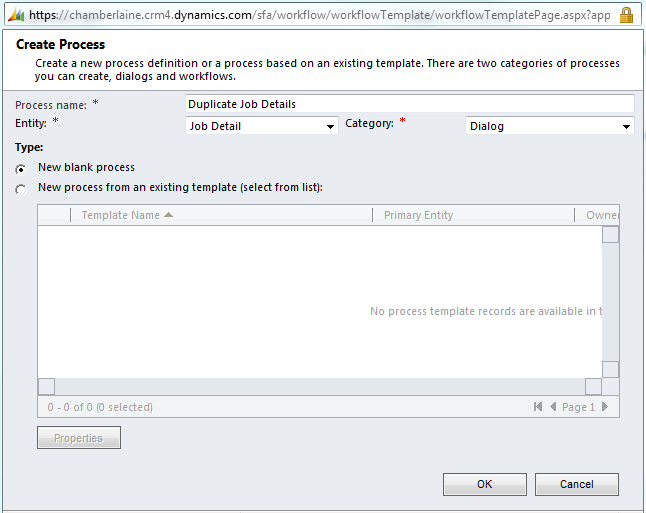
So we create a new process and fill in the dialog fields as below.
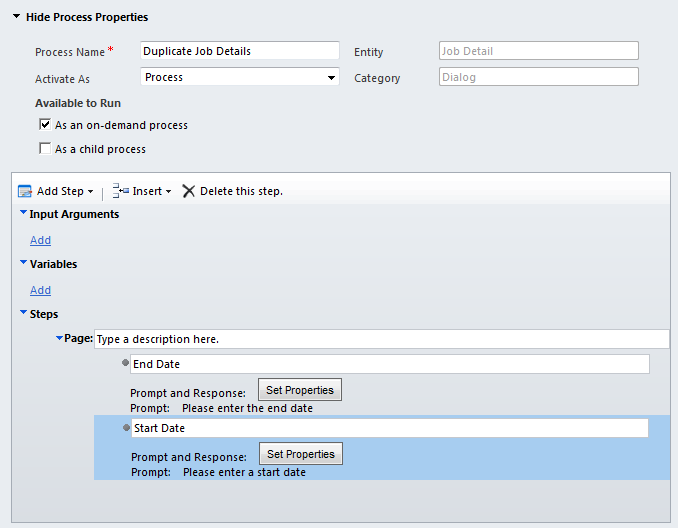
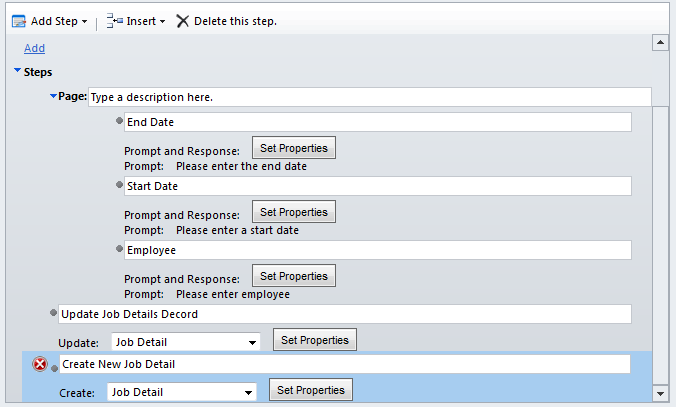
Within the next screen we need to select on add step and add a page element. We now need to add 3 prompt and response fields. The first and second are date only fields called start and end date. Enter some response text and set the response type to date only by clicking the ‘Set Properties’ button. It should look something like the image below
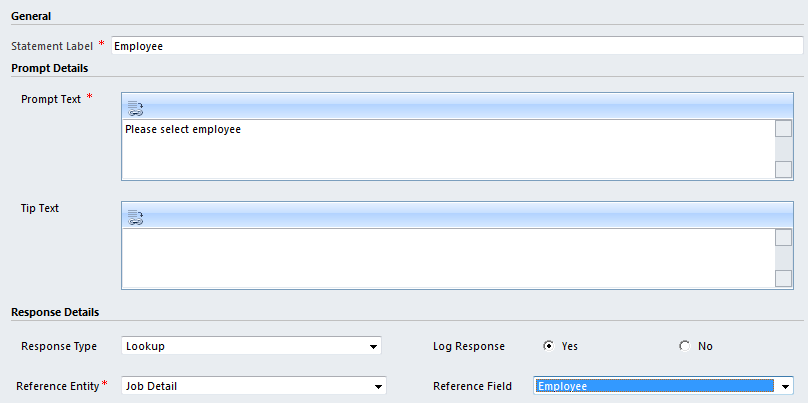
Next we need to a prompt and response field for the employee lookup so click the ‘Set Properties’ button again. Make sure the ‘Source Type’ is set to lookup and the reference entity is the entity type you are duplicating. Finally select the ‘reference field’ which is effectively the lookup field in the entity. The dialog should be filled is something like that below.
Now highlight the page item on the main dialog page and ‘select update’ record from the ‘add step’ dropdown. We will now set the highlighted records end date. Click ‘Set Properties’ in the update
Once the dialog opens click into the end date field and then click on the look for drop down on the right hand side. Within this dropdown there is a section at the bottom called local values. Here you will find the end date. Select it and then click add and then ok. Yellow text should now appear in the end date field. Click save and close. Now add another step called Create Record and then select the correct entity from the dropdown and click ‘Set Properties’.
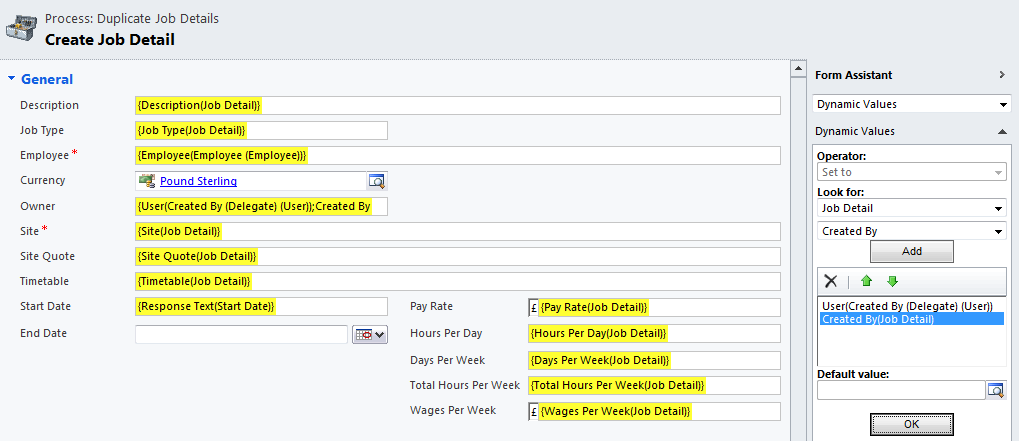
We now need to go through and update each field from the dropdown list on the right. Once this is all done we need to add the lookup response. Find the look up field in the dialog (in our example it is employee). Then click on the dropdown and find the local values again. You will see the employee response is here. Select it, press Add and then Ok obviously making sure your cursor was sitting in the correct field.
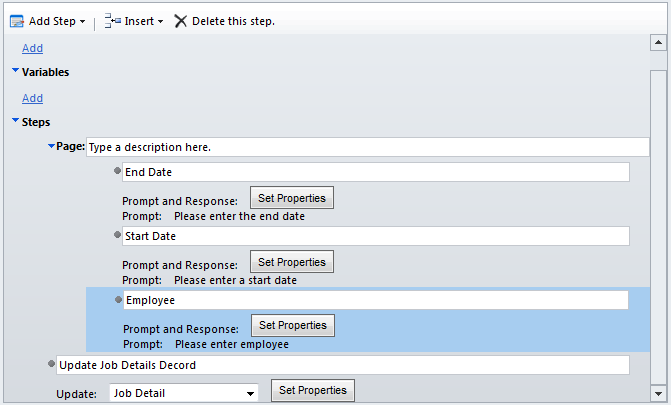
Once complete your screen should look some like this.
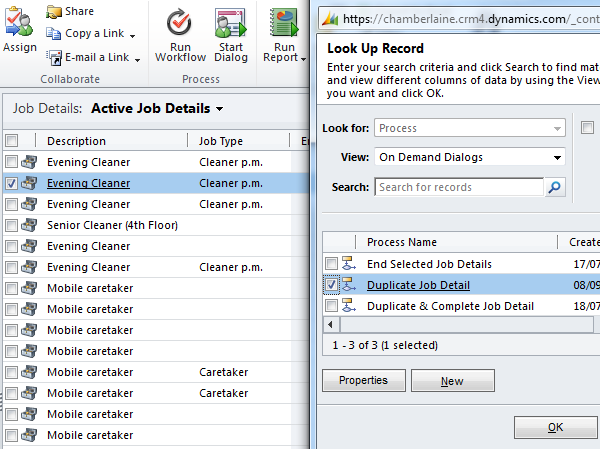
Now click save and close. Click save on the main dialog screen and then click activate. Now when a user is within their list of job details they can select one record and then click on the start dialog button.
Once all the fields of the dialog have been completed then the record will be updated and a new duplicate record will have been created.
Hope this little run through helps in any way.
Feedback or questions always welcome.


Recent Comments